 Fairhaven Siding
 Chuckanut Siding Takes a Different Kind of Beating
Homes tucked along the wooded slopes and shoreline around Chuckanut face a combination of conditions that most siding never has to deal with. You've got salt-laden air moving off the water, driving rain that comes in sideways during winter storms, and heavy tree cover that keeps large sections of exterior walls shaded and damp for weeks at a time. Add in the humidity that settles into low-lying, forested areas of Whatcom County, and you get a moss season that can run from late fall through spring.
None of that is unusual for this part of Washington. But it does mean siding repair here isn't a generic job. A repair that would hold up fine on a dry, sun-exposed lot in eastern Washington can fail within a couple of seasons on a shaded, north-facing wall in Chuckanut if it isn't done with the local climate in mind. That's the difference between a patch that looks fine for a photo and a repair that actually holds.
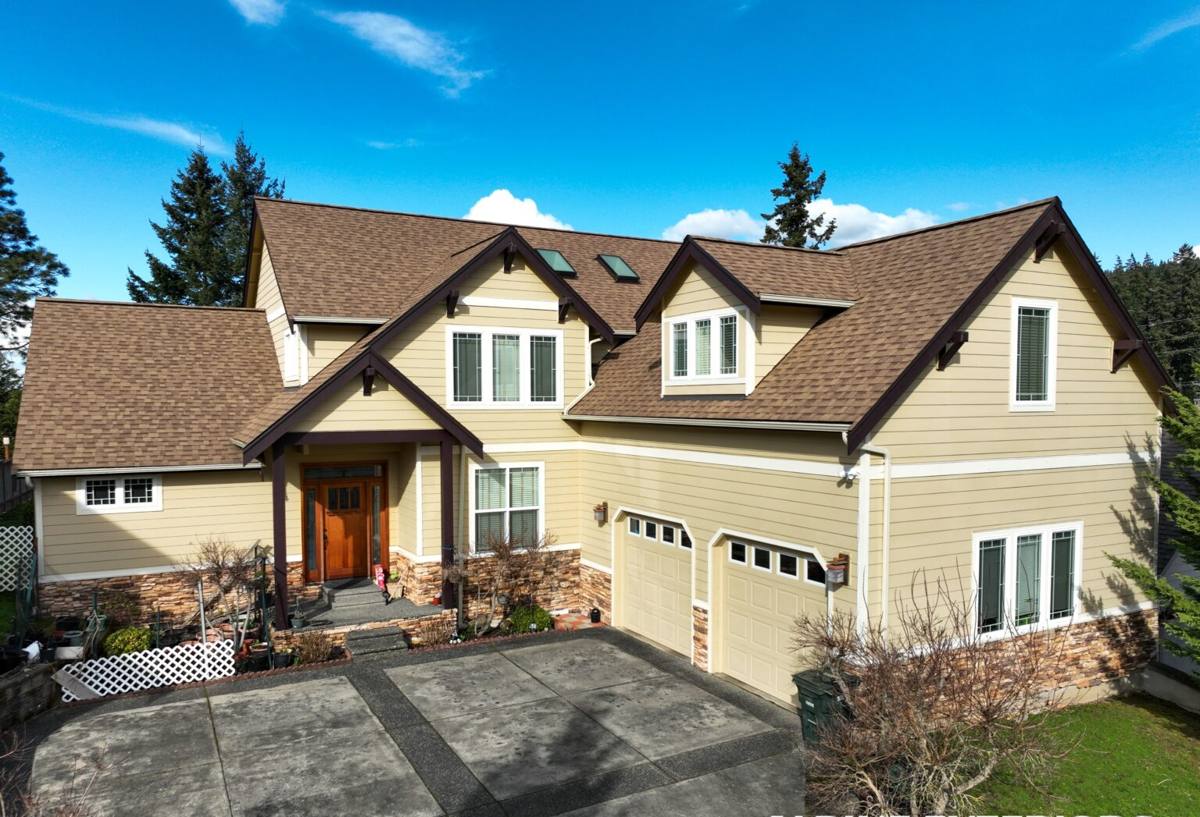
What "Correct" Siding Repair Actually Means
A lot of siding repair work in this region gets treated as cosmetic — replace the damaged board, caulk the edges, paint it, done. That approach misses the point. Siding is a system, not a collection of individual boards. Behind every panel is a water-resistive barrier (WRB), flashing details at windows, doors, and trim, and a drainage plane that's supposed to move any moisture that gets behind the cladding back out and away from the wall assembly.
When a board fails — whether it's cracked, delaminating, or just showing rot at the bottom edge — that's rarely the whole story. It's usually a symptom of something happening behind the siding: a compromised WRB, a flashing detail that was never installed correctly, or moisture that's been sitting against the substrate long enough to do damage you can't see from the outside. Correct repair means opening things up enough to find out what's actually going on, not just swapping the visible piece and moving on.
This matters more in Chuckanut than in drier parts of the state. With near-constant winter moisture and slower drying times under tree canopy, any gap in the water management system has more opportunity to cause real damage before anyone notices.
Common Siding Repair Needs We See in This Area
Moss and Algae Staining
Shaded walls, especially those facing north or tucked under mature trees, develop moss and algae growth faster here than almost anywhere else in the county. On its own, surface growth is mostly a cosmetic issue — but moss holds moisture against the siding surface far longer than bare cladding would, and over years that constant dampness accelerates wear at seams, fastener points, and butt joints. Left unaddressed, what starts as green staining can turn into softened trim boards or failed caulk lines.
Moisture Damage Behind the Cladding
This is the repair issue that matters most and shows the least from the street. Driving rain pushed by wind off the water finds its way into any weak point — a nail hole that wasn't sealed, a butt joint without proper flashing, a window trim detail that was caulked instead of flashed. By the time you see staining, swelling, or a soft spot on the interior side of a wall, moisture has usually been working on that spot for a while.
Impact and Wind Damage
Winter storms bring branches, debris, and sustained wind loads that can crack panels or work fasteners loose over time, especially on homes near tree lines. Loose panels are more than a cosmetic problem — any gap behind the siding is an entry point for wind-driven rain.
Failing Caulk, Seams, and Trim Joints
Caulk is a wear item, not a permanent fix, and in a climate with this much seasonal moisture and temperature swing it breaks down faster than most homeowners expect. Cracked or shrunken caulk at trim boards, corners, and window returns is one of the most common things we find during an inspection, and it's often the earliest warning sign of a larger issue.
Repair vs. Replace: How We Make the Call
Not every damaged section needs to come off the wall, and not every repair should be limited to what's visible. We look at a handful of factors before recommending a path, and we explain our reasoning rather than just handing you a number.
| Factor | Favors Repair | Favors Replacement |
|---|---|---|
| Extent of damage | Isolated boards or a single wall section | Damage spread across multiple elevations |
| Moisture intrusion | Surface-level, caught early | Sustained intrusion with substrate or sheathing damage |
| Siding material | James Hardie fiber cement, sound elsewhere on the home | Failing or discontinued material that can't be matched |
| Age of existing siding | Well within expected service life | Nearing end of life with repeat failures |
| Underlying WRB condition | Intact, just needs re-detailing at the repair area | Compromised or original barrier failing broadly |
Homes with existing James Hardie siding are usually the easiest repair calls, because Hardie boards hold their dimensions and finish consistently over time, so a matched repair blends in rather than standing out. Homes with older wood, vinyl, or discontinued composite products are a harder call — sometimes a targeted repair is still the right move, but we'll tell you honestly when a full section replacement makes more sense than chasing a match that won't hold up.
Our Repair Process, Step by Step
- Inspection first. We look beyond the visible damage — checking fastener lines, trim returns, and any accessible interior signs of moisture before quoting anything.
- Identify the root cause. If there's a flashing gap, a WRB tear, or a drainage issue behind the damaged area, we address that before touching the visible siding — otherwise the repair just fails again.
- Remove damaged material carefully. We pull back only what's necessary to expose the problem, protecting sound siding and trim around the repair zone.
- Correct the water management detail. This means proper flashing, house wrap repair or overlap, and correctly lapped drainage planes — the part that doesn't show once the job is done but determines whether it lasts.
- Install matched material. For Hardie siding, we match profile, exposure, and factory finish so the repair reads as part of the original wall, not a patch.
- Seal and finish to spec. Fastener patterns, caulk joints, and paint touch-up follow manufacturer installation guidelines, not shortcuts.
- Final walk-through. We show you what we found, what we fixed, and what to keep an eye on going forward.
Why Local Experience in Chuckanut Matters
A crew that only works in dry, low-moisture regions of the state approaches siding repair differently than one that works this coastline regularly. Knowing how sun exposure and moisture load vary wall-to-wall on a wooded, sloped lot changes where we look first during an inspection. Knowing how salt air affects fastener corrosion and finish wear over time changes what materials and hardware we spec for a repair. And having done this kind of work up and down this part of Whatcom County means we're not guessing at how a repair will hold up through the next few wet seasons — we've already seen how similar repairs perform here.
There's also a practical side to hiring local: shorter response times for follow-up, familiarity with the permitting expectations in the area, and a crew that isn't learning the region's quirks on your dime.
Signs Your Chuckanut Home Needs a Siding Inspection
- Visible moss, algae, or persistent dark staining on shaded walls
- Cracked, shrunken, or missing caulk at trim, corners, or window returns
- Soft or spongy spots when you press on siding or trim boards
- Peeling or bubbling paint, especially on lower wall sections
- Visible gaps or separation at panel seams and butt joints
- Musty odor or staining on interior walls near exterior siding
- Warping, cupping, or visible movement in individual boards
- Fasteners backing out or rust streaking down from nail heads
If you're seeing more than one or two of these, it's worth having someone look before the next round of winter storms rather than after.
Maintaining Repaired Siding Through the Wet Season
A correct repair sets you up for the long haul, but a little seasonal attention goes a long way in this climate. Keep tree branches and vegetation trimmed back from exterior walls where possible — it reduces both moss growth and the risk of impact damage during storms. Rinse shaded, moss-prone areas periodically rather than letting growth build up over multiple seasons. Check caulk lines at trim and window returns once a year, since this is the first thing to wear out under repeated wet-dry cycling. And after any major windstorm, a quick visual check for loose panels or damaged trim can catch a small problem before it becomes a bigger one.
None of this requires special equipment or expertise — it's the same basic upkeep that protects any exterior in a wet coastal climate. The goal is simply to not let small issues sit through an entire winter unaddressed.
Why We Only Repair and Install James Hardie Siding
When a repair does call for new material, we use James Hardie fiber cement exclusively. It's non-combustible, holds its factory ColorPlus finish far longer than field-painted alternatives, and Hardie's HZ product lines are engineered specifically for climate zones like ours — which matters directly for repair work, since it means a properly matched patch is built for the same moisture and temperature swings as the rest of the wall. Combined with a strong transferable warranty, it's the material we're comfortable standing behind on a repair as much as a full replacement.
If your Chuckanut home has siding trouble — whether it's a single damaged section or something that looks more widespread — we're happy to take a look and give you a straightforward assessment. Fill out the form below for a free, no-pressure estimate.